
How to set up a book cover for printing
One page, not two: a cover file carries the back, the spine and the front on a single sheet, with bleed all round. Here is how the sheet is measured, where the spine width comes from, and what gets a file sent back.
Setting up a cover, section by section
Every section is here. Open the one you need — or work down them in order the first time through.
The short version
Five things a cover file has to get right
Work out the spine
The spine grows with the page count and the paper. We calculate it for you and print it on the template — do not guess it, and do not reuse the spine from a different book.
Build the whole wrap on ONE page
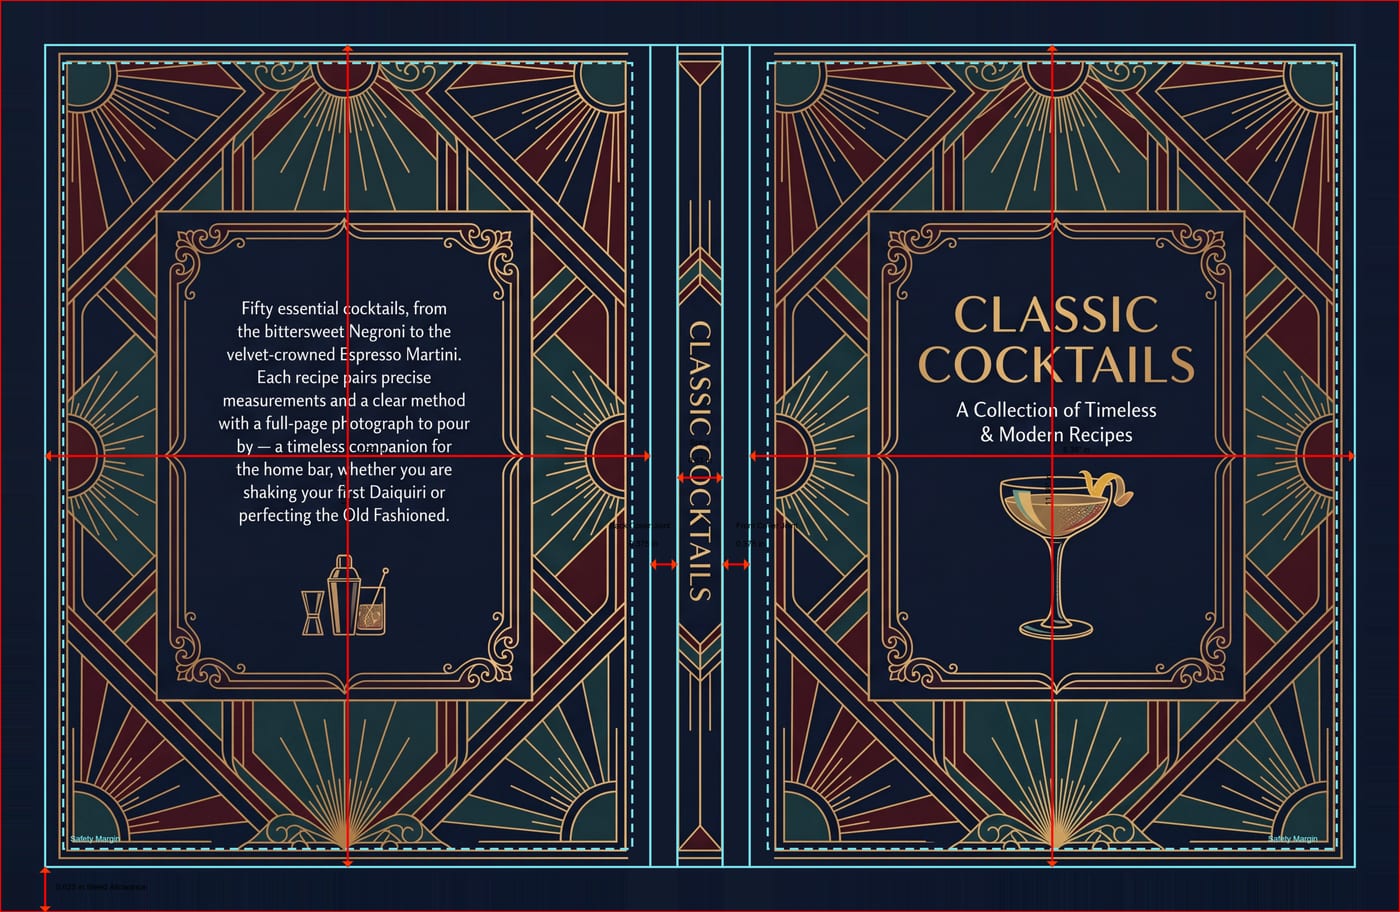
Back cover, joint, spine, joint, front cover, left to right on a single sheet. A file split into separate front and back pages is the most common thing we send back.
Carry the artwork past the trim
Anything meant to reach the edge runs out into the bleed. On a hardcover casewrap that bleed is not cut off — it wraps the board and folds inside the case.
Keep type inside the safety line
Text and logos stay inside the dashed line on each panel, and out of the joints, which curve where the cover hinges.
Export with the template layer intact
Our guides sit on a PDF layer named "Template" so they can be switched off. Export with layers preserved, or delete that layer before you export — flattened guides print.
One sheet
The cover is not a front and a back
It is one continuous piece of artwork that reads left to right: back cover, spine, front cover. On a hardcover there are two more strips, the joints, either side of the spine where the case hinges open. A file split into a separate front and back is the most common thing we send back, because there is no way to know from two loose pages how the artwork was meant to meet across the spine.
Design it as one sheet from the start: a background that runs the whole width of the wrap, the title on the front panel, an ISBN block low on the back panel, and nothing important in the joints.

The measurement people get wrong
The spine comes from the page count and the paper
A 200-page book on 70lb uncoated stock has a different spine from the same 200 pages on 100lb gloss. We calculate it from your specification and print the figure on the template you download.
Do not guess it
A spine two millimetres out puts the title off-centre on the finished book, and that is visible from across a room.
Do not reuse another book's
A different page count or a different paper means a different spine, even for a sequel at the same trim size.
Settle the page count first
Adding four pages late changes the spine, and the spine change moves everything on the cover. Finish the interior, then build the cover.
Keep type off the fold
On a thin spine, a title that fills the full width can drift onto a board. Leave a little air at each end.
Hardcover extras
Dust jackets and endpapers are their own files

A dust jacket is wider than the case it wraps. Beyond the front and back panels are two flaps that fold inside the covers, and the fold lines are printed on the template. Blurb and author photo go on the flaps, and nothing important should sit within a few millimetres of a fold, because a fold is never placed to the thousandth of an inch.
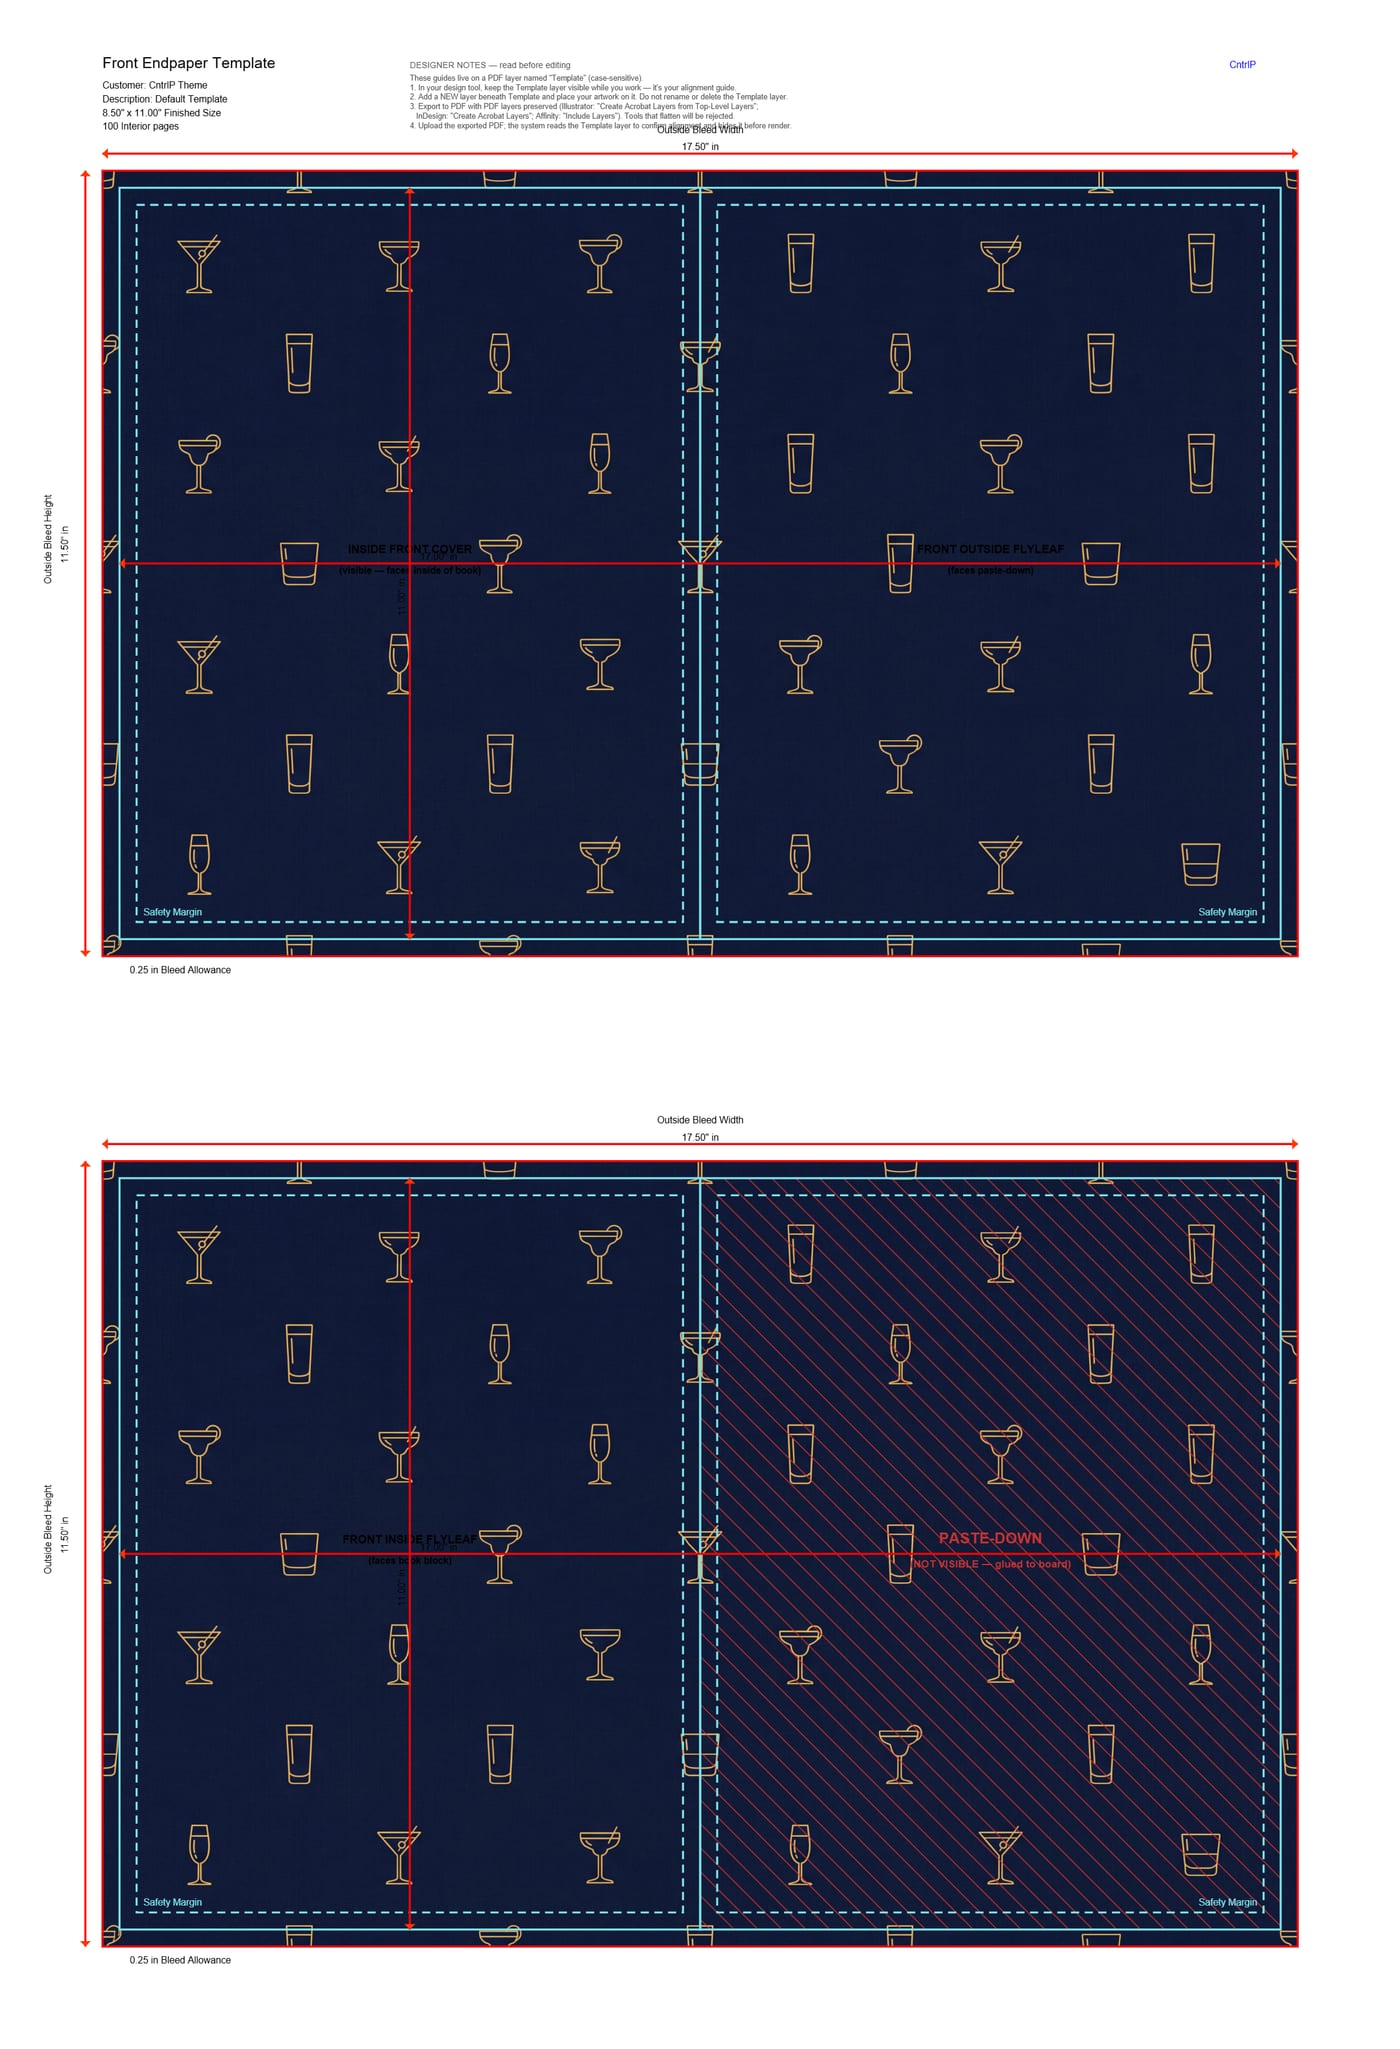
Endpapers are the sheets glued to the inside of each board. Half of each sheet is pasted down and is effectively invisible, so the template hatches that area. Endpapers can also just be a solid colour, in which case there is no file to build at all.
Slipcases
A printed slipcase is one wrap too
A slipcase covered in cloth or leather needs no file: you choose the material and any stamping, and approve it on the proof. A printed slipcase is artwork, and it is one sheet that wraps three sides of the box, reading front | closed edge | back from left to right.
That order is the reverse of a book cover, and it is not a mistake. A slipcase shows the book's spine at its open end, so looking at the front of the case the open end is on the left. The open end is at both outer edges of the sheet, and a thumb notch, if you ordered one, is cut there, so keep lettering well clear of those edges.
Like a casewrap, the sheet carries a generous turn-in all round that folds over the board edges and inside the case, so run the background all the way out. Download the template from the Slipcase card on your proof. It is sized from every book the case holds, so wait until the page counts are final.
Bleed on a casewrap
Here the bleed is not thrown away
On most printing, bleed is the margin the trimmer cuts off. A hardcover case is the exception: the printed sheet is wrapped around the boards and folded inside, so what sits outside the trim line does not vanish. It turns in and stays visible at the edge of the finished case.
That is why a casewrap template asks for a generous bleed, and why a white edge left in the artwork becomes a white band wrapping the board. Run the background all the way out.
Before you send it
What gets a cover file sent back
A separate front and back
Rebuild it as one sheet on the template. We cannot infer where the artwork was meant to meet across the spine.
Guides baked into the artwork
Dashed lines and dimension callouts flattened into the file are ink, and ink prints. Export with layers, or delete the Template layer first.
No bleed
Artwork that stops exactly at the trim leaves a white sliver wherever the cut lands a hair outside it.
A different size from the template
Scaling a cover to fit moves the spine off the spine. Build at the size the template is drawn at.
Type in the joints
The joint is where the case bends. Anything placed there lands on a curve and reads crooked.
Low-resolution images
A picture that looks sharp on a screen can be a quarter of the resolution a press wants. Aim for 300 ppi at final size.
Send the file and we will look at it
We check every cover before it goes near a press, and we will tell you what is wrong rather than only that something is. If you would rather not build it at all, our designers can do that instead.